What are Pipefy Forms?
Forms capture data from internal or external users, can be customized to include specific fields and require certain information, initiate the AR workflow, and consolidate data into a single source of truth.
Pipefy Forms helps individual contributors and small teams scale processes and manage requests more efficiently. The smart form connects internal and external requests directly with the process to reduce errors and manage the process effectively. This keeps your business running with limited cash flow interruptions.
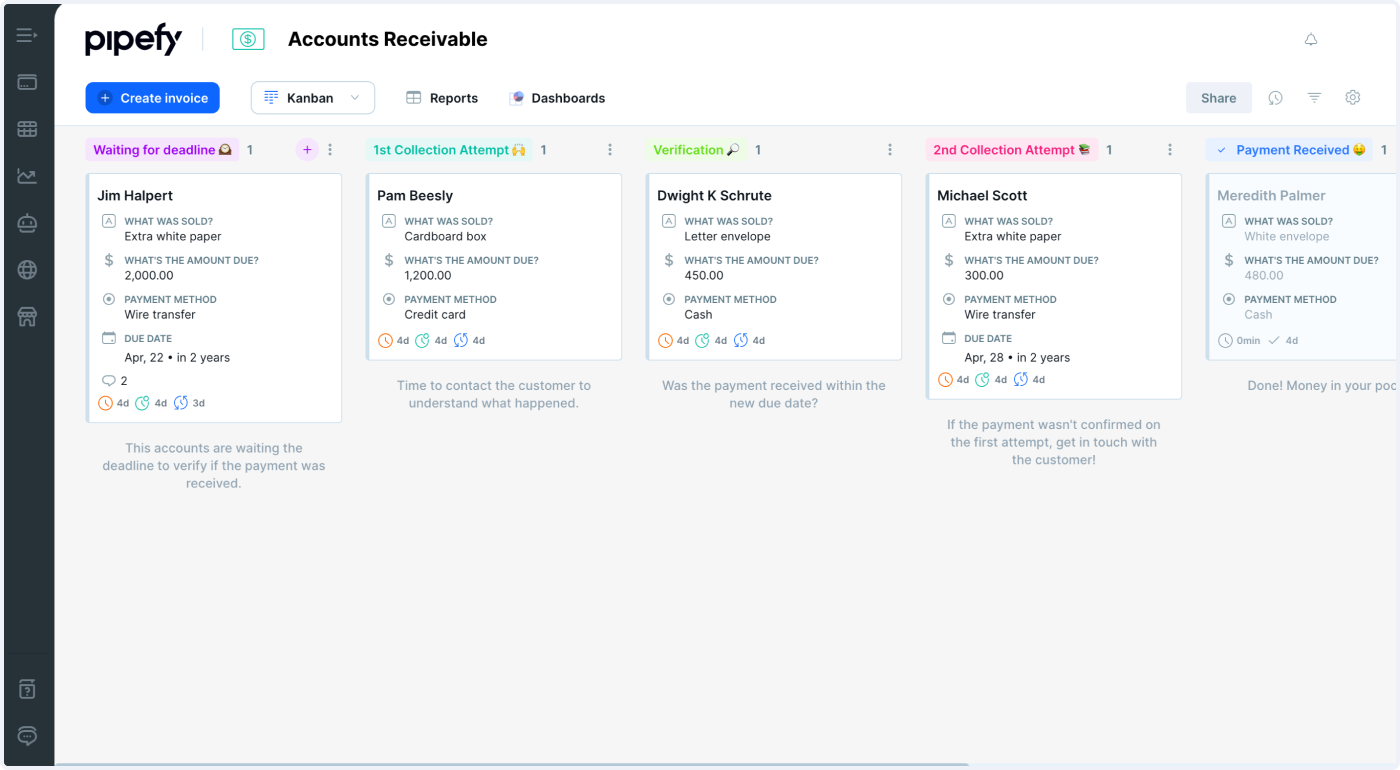
Accounts receivable process improvement idea: switch from spreadsheets to Pipefy Forms
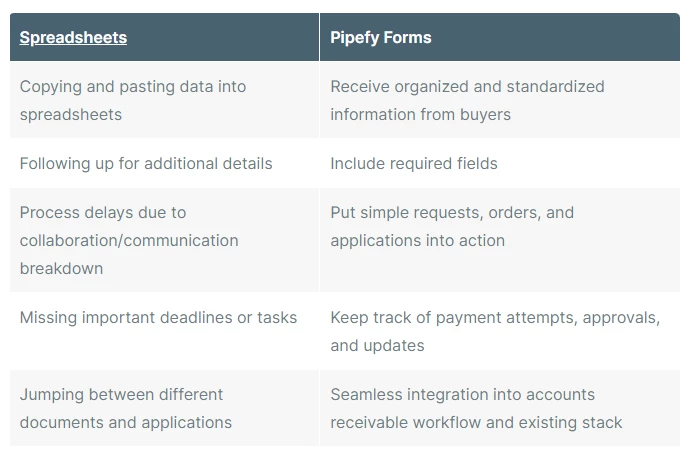
How to use forms two ways: pre-built or from scratch
A start form is what jumpstarts a new request in the accounts receivable process, so it’s essential that the form you create includes all the information related to your accounts receivable process.
Once a form is completed, the process begins, the information is routed to the right person and the data captured becomes a “card.” (A card is simply a visualization of the data in a particular item. Each request will appear as its own card.)
There are two ways to create a form: use the Pipefy Form included with the accounts receivable workflow template or create your own from top to bottom.
If you’re looking to create a form quickly, try the pre-built form. This form comes included with Pipefy’s accounts receivable workflow template. The pre-built forms can be easily modified with a simple drag-and-drop interface, so you can easily add or remove fields.
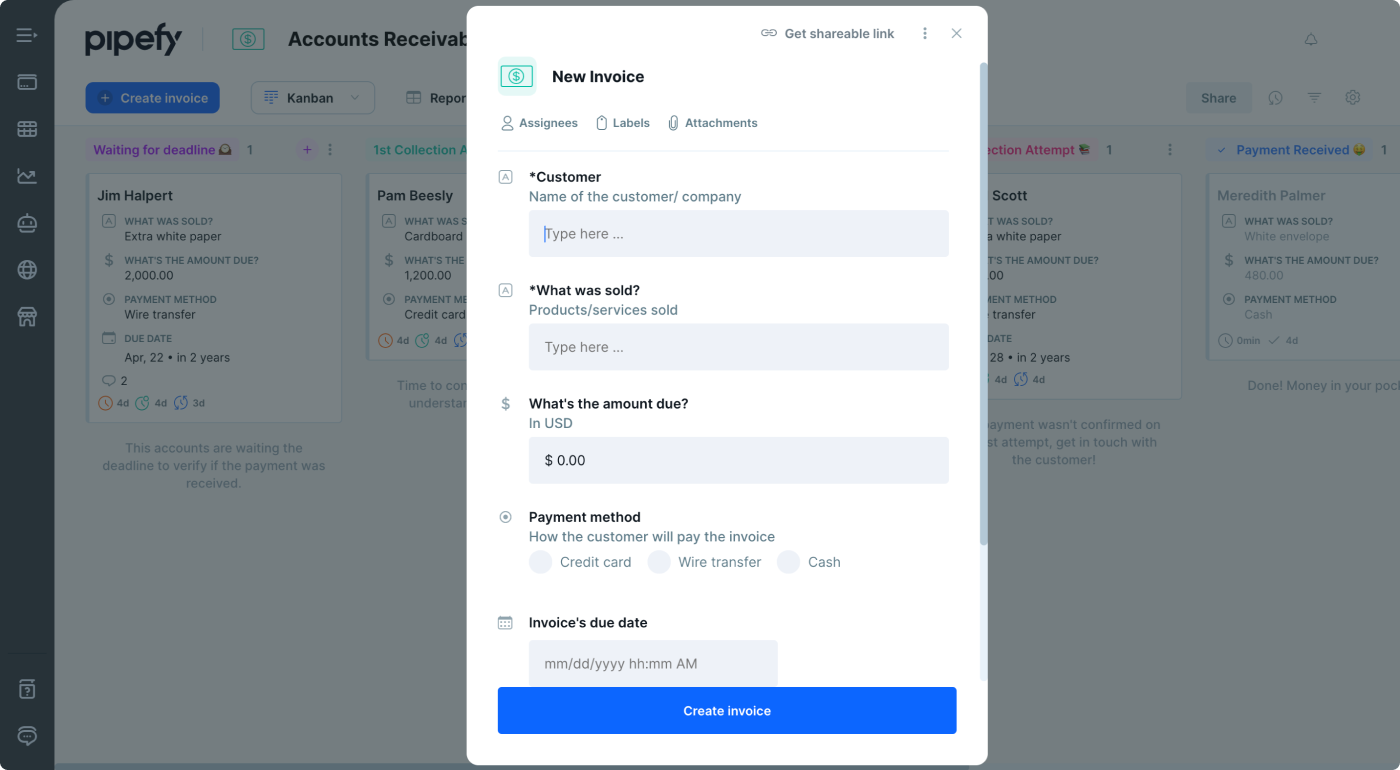
Step 1: Identify pain points
In order to make the most of the template, it’s important to understand the problems that need to be solved. For the accounts receivable process, one of the top challenges affecting companies is missing, disorganized, or incorrect data.
Step 2: Define form fields to accurately capture information
Pipefy Forms standardizes information collection to minimize errors and prevent missing information. With required field options and easily customizable form fields, you’re guaranteed to have all the information you need every time an order is placed or service is requested.
For the accounts receivable process, this information includes:
- Buyer account numbers, names, and emails
- Type and amount of purchased goods or services
- Payment amounts due
- Payment due date
- Payment methods
- Approvers (internal)
Pipefy’s no-code interface makes building your custom form (and customizing templates) quick and easy with its drag-and-drop feature.
Once you have all the information you need, it’s time to build and make your form your own.
Step 3: Create and customize your form
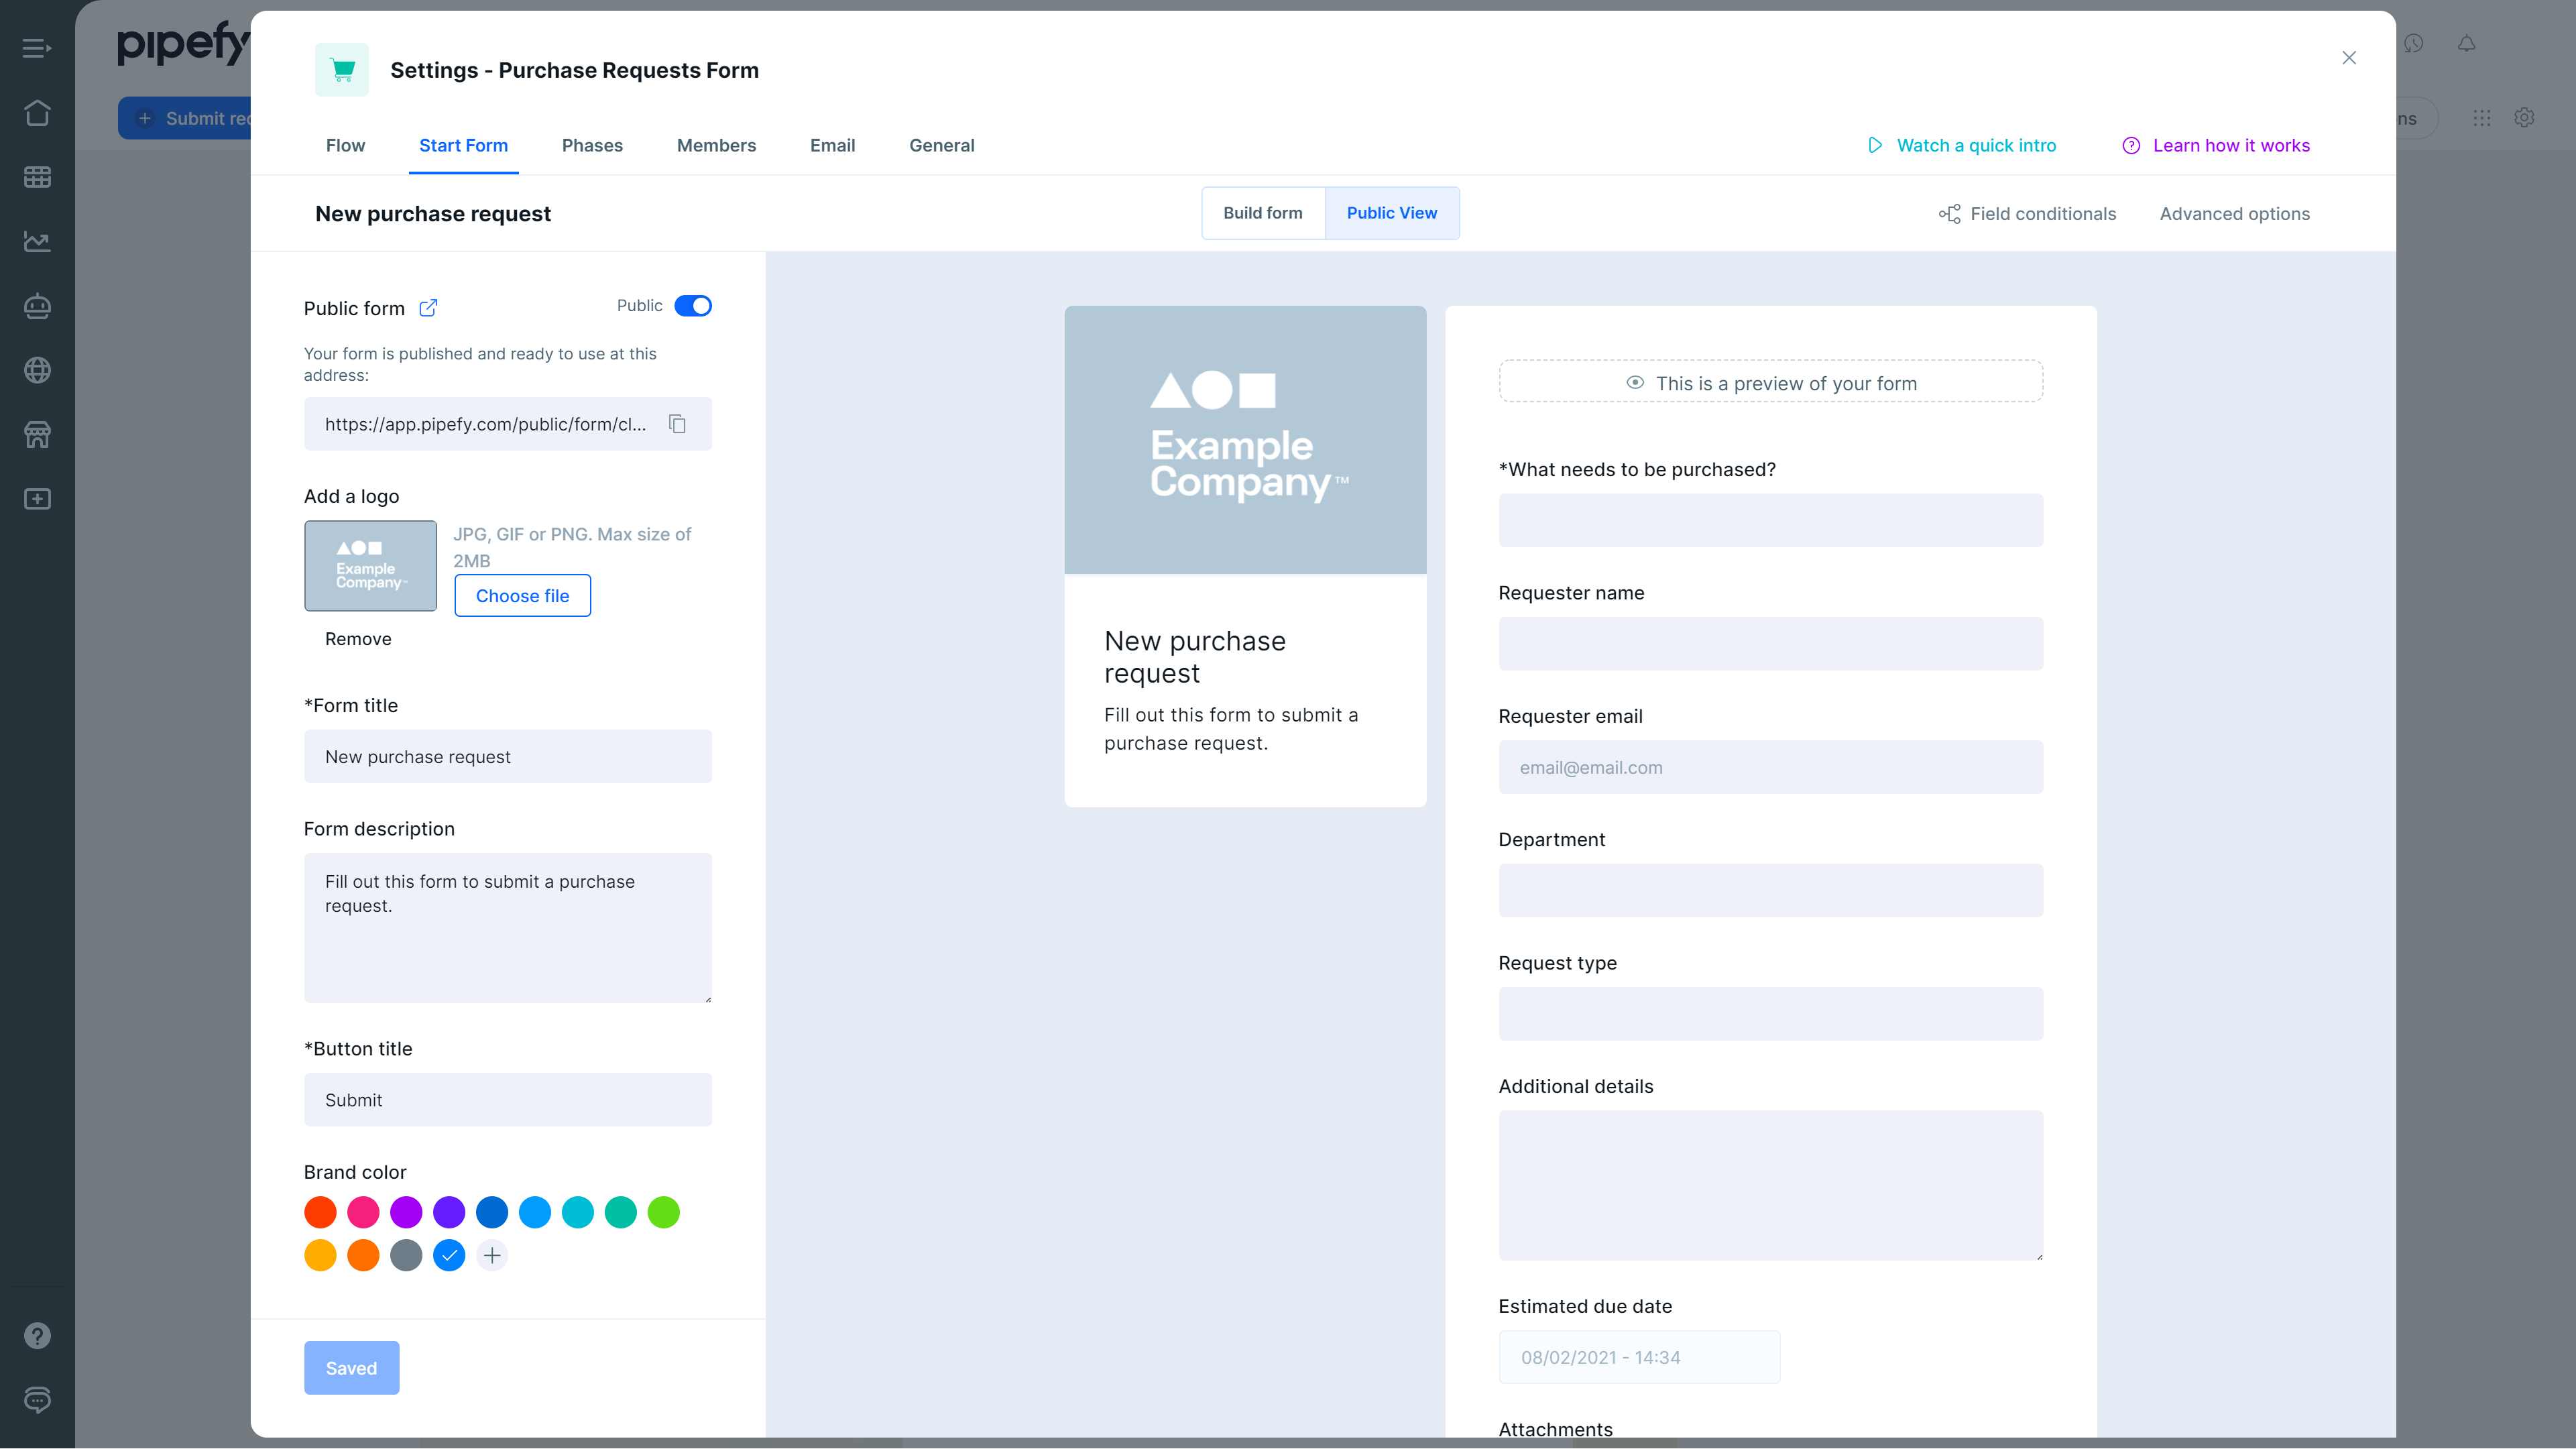
Using the drag-and-drop options to the left side of the form, select the additional fields you’d like and add them to your form. Not sure what each field does? Here’s a list of helpful field options:
- Timelines: Use the date and datetime field to include deadlines due on specific days, months, hours, and minutes.
- Short text vs long text: Short text is great for things like manually entering a name. Long text is ideal for descriptions or explanations.
- Radio select: Great for choosing one option out of a group of items.
- Dropdown select: Standardize the intake process and add a list of options in which only one option can be chosen; similar to radio select function but visually different.
- Checkbox: If there’s more than one answer or option that can be selected, add a list of options to be checked.
- Attachment: When dealing with invoices, be sure to include this field to attach files.
Once the required fields are added, personalize it further by adding a company logo or background image. You can also edit the title and description to really make it your own.
3 Pipefy Forms best practices
1. Keep it clear and simple. By only including the fields that are necessary, you’ll minimize any confusion and improve the collections process. To ensure that buyers know what information to share, make sure each form field is clear and avoid jargon. If your fields need to be further defined, try using the help text or description feature.
2. Use field conditionals to “hack” your forms. Field conditionals can be used to create more complex rules by adding more conditions in the scenario. For the accounts receivable form, you can include an approval request when a value in the currency field or amount field is over a specified amount.
By adding field conditionals, you can also:
- Skip or hide required fields based on the value of a previous field.
- Request more information based on certain conditions in previous fields, and make forms/phases compact by only asking for more information when needed.
- Entice buyers to up their purchase request by alerting buyers of any discounts when ordering a certain amount or paying before a payment deadline.
3. Automate your process so you never miss a beat. With automation, you can cut out the extra time spent following up with buyers, following up on missed payment deadlines, and sharing invoices with automated email templates.
Improve your data collection with Pipefy
Pipefy Forms makes organizing and improving your accounts receivable process easy. In addition to standardizing your data collection and tracking key details like missed payments, Pipefy’s no-code interface lets you easily create smart forms, automate key tasks to eliminate endless follow-up email threads, and keep up with new activity — providing your team with full visibility of information.
Writeen by Karina Corona


